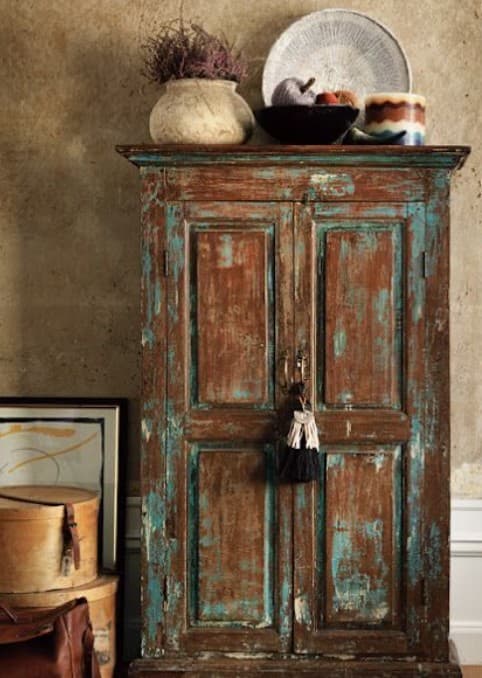
There are cabinets you buy. And then there are cabinets you find — cabinets that have lived a life, that carry decades of decisions and accidents in their surface, that you can stare at for a long time and still find something new. This is the second kind. The paint has worn through in a dozen places, revealing layers of teal, brown and bare wood beneath. A tassel keyring hangs from the original key. On top: a worn ceramic jug, a decorative plate, a small ceramic bowl and a dried flower. Beside it on the floor: an old round hat box and a battered leather suitcase. It is entirely, deeply, beautifully itself.
What makes distressed paint so compelling
A piece of furniture with peeling, layered paint has a quality that new "distressed finish" items cannot replicate: genuine history. The teal paint visible beneath the brown was a real decision, made by a real person, at a real point in time. Where the paint has worn through entirely, you see the wood — sometimes still showing the grain of the original piece. Each layer is a stratum of someone else's taste, and together they're more interesting than any single colour choice could be.
How to style a statement cabinet
The styling on top of this cabinet is perfectly calibrated. A rough ceramic jug — clearly handmade, not perfectly round — holds a dried floral stem. A large decorative plate, leaning not hanging, is slightly off-centre. A small dark ceramic bowl sits to the right. Nothing is symmetrical; nothing matches exactly; everything belongs to the same family of weathered, earthy, natural objects. This is how you style a cabinet that already has presence: you don't compete with it. You echo it.
The leather suitcase stack
Two pieces of vintage luggage beside the cabinet — a round hat box on top, an old leather suitcase below — serve as both storage and display. This is a classic styling move in rustic and vintage interiors: objects that have a function but are displayed for their beauty. Old luggage works because the materials (leather, canvas, worn hardware) speak the same language as distressed paint and handmade ceramics.
Where to find pieces like this
Flea markets, estate sales and online marketplaces like eBay, Finn.no and Facebook Marketplace are the primary sources. Look specifically for pieces where the original paint or finish has worn unevenly — this creates the layered look that makes distressed furniture interesting. Avoid pieces where the "distressing" has been applied artificially with sandpaper and wax in a factory; the effect is flat and unconvincing.
Interior tips
- Don't restore antique paint — the layers are the point. Clean, oil if dry, wax if needed, but leave the peeling surface exactly as it is. It took decades to look like this.
- Match your accessories to the cabinet's history: ceramics and objects that look hand-thrown, worn, or found work better than anything new or polished. The cabinet will make new objects look cheap rather than the other way around.
- Use dried flowers rather than fresh: fresh flowers have a liveliness that can feel jarring against very old furniture. Dried seed heads, dried botanicals and pressed flowers have the same quietness as aged wood and cracked paint.
- Let it stand against a textured wall: this cabinet is photographed against a warm, rough plaster wall. A smooth white wall would drain it of context. The rougher the wall, the more at home the cabinet feels.
- One key with a tassel in the lock is one of the most characterful small details you can add to an antique cabinet — it suggests the piece is still used, still functional, still itself.
How to integrate vintage furniture into a contemporary interior
The most common failure mode when mixing an antique piece into a modern home is treating it as a curiosity on display rather than genuinely integrating it. A distressed cabinet standing alone in a room of flat-pack furniture reads as accidental — a rescue that did not quite work. For a genuine vintage piece to succeed in a contemporary interior, it needs context.
Practical ways to build that context without turning the whole room into a museum:
- Add at least one vintage textile in the same sight line — a worn kilim, an old linen grain sack, a patched blanket. Textiles with age tie back to the cabinet without competing with it.
- Use warm, imperfect lighting. A clear filament bulb in a simple fitting, a candlestick, or an oil lamp flatters patina in a way that flat overhead lighting does not. Patina disappears under bright, even light.
- Include handmade ceramics or pottery on and around the piece. Perfectly regular, machine-made objects look incongruous beside genuinely old furniture. Rough-edged, hand-thrown pieces speak the same language.
- Avoid surrounding it with too many other statement pieces. Distressed furniture with strong presence needs space to breathe. Give it one or two supporting objects and leave the rest of the room quieter.
Cleaning and caring for antique painted furniture
Old paint should not be washed with water. Moisture can lift paint layers and accelerate peeling, especially where the paint is already loose or thin. For routine dusting and cleaning, use a dry or barely damp cloth, working gently along the grain of the wood beneath.
For deeper cleaning, a cloth very lightly dampened with white spirit removes grime effectively and does not affect the paint surface. Work in small sections and buff dry immediately.
To stabilize paint that is actively flaking, brush a diluted PVA solution (one part PVA to five parts water) over the affected area and allow to dry completely before touching. This bonds loose paint to the surface without visibly changing the finish. Do not apply varnish or lacquer topcoat over old painted furniture — it changes the quality entirely and is very difficult to reverse.
Exposed wood sections benefit from a light application of beeswax or furniture wax every six to twelve months, buffed in with a soft cloth. This prevents the wood from drying out and cracking while keeping the natural colour rather than darkening it.
DIY distressing: when it works and when it does not
If a genuinely aged piece is not available or within budget, a multi-layer paint finish is the closest achievable result. The process is straightforward:
- Apply a base coat in a deep, earthy colour — raw umber, dark teal, or warm brown.
- Allow to dry fully. Apply a second coat in the intended top colour.
- While the top coat is still slightly tacky, use a crumpled cloth or plastic bag to dab and lift areas of paint, focusing on edges, corners, handles, and any raised moulding — the places that would genuinely wear through first.
- When fully dry, sand the worn areas lightly with fine-grit sandpaper to reveal the base coat and bare wood beneath, blending the edges.
- Seal with matte paste wax or diluted PVA.
The result will not replicate decades of genuine wear, but it is considerably more convincing than the flat "distressed" finishes applied in factories to sell at mass market prices. The difference is in the concentration of wear: genuine and well-executed DIY distressing is heaviest at points of real contact and fades naturally inward. Factory distressing is often applied at random, with no relationship to how the piece would actually be used.
Related posts

How to Frame a Doorway with Plants for a Stunning Kitchen View
Trailing plants on a shelf above a black-framed doorway, floor plants on either side, and a warm Scandi kitchen beyond — how to make a transition space the most beautiful part of your home.

The Hygge Living Room: Layering Textures, Candles and Natural Materials
Patterned cushions, chunky knit throws, wooden tray tables, candles and eucalyptus — how to build a living room that feels genuinely cosy all year round.
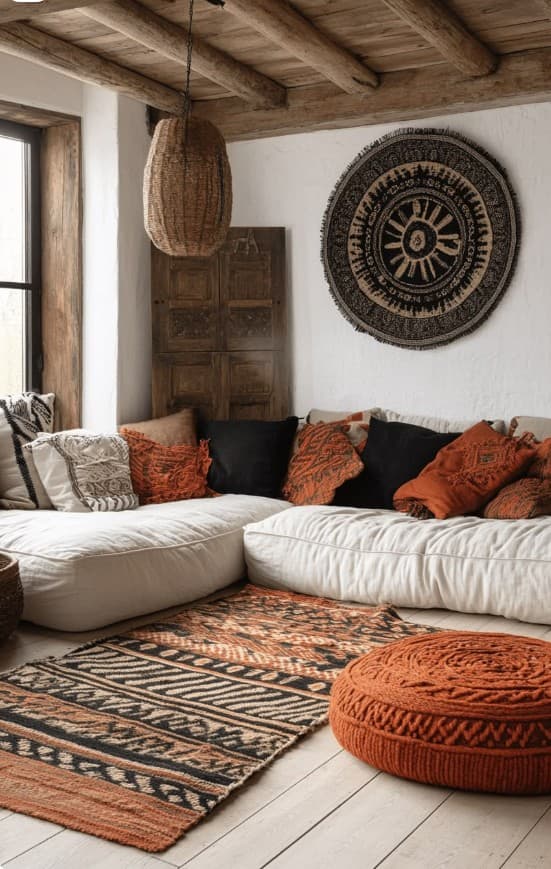
Rust, Black and White: The Boldest Boho Palette in One Living Room
A low white sectional sofa loaded with rust-orange ethnic cushions, a black circular wall tapestry, a bold kilim rug and a rattan pendant — this is boho living room design at its most confident and distinctive.