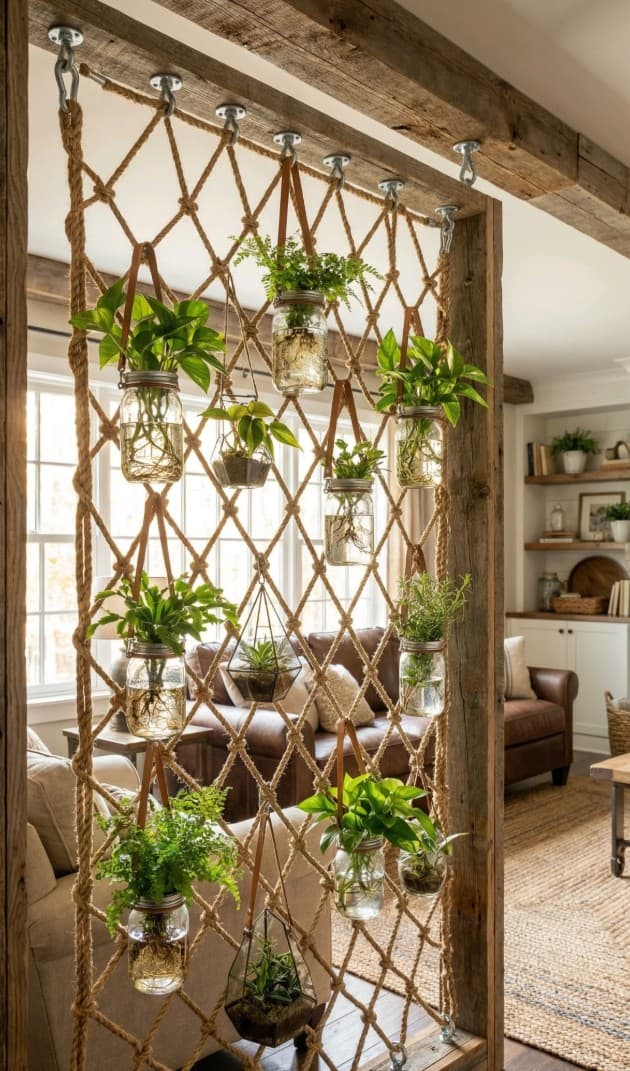
A rope room divider with hanging plants is the kind of project that looks like it belongs in a professional interior shoot — but is genuinely achievable at home with basic materials and a free weekend. The result creates a soft, living boundary between two areas without blocking light or making a space feel smaller.
What you need
- Thick natural jute rope (at least 8–10 mm diameter)
- Two wooden beams or a doorframe to mount to
- Ceiling hooks or eye bolts
- Glass jars or small hanging planters
- Trailing or compact plants (pothos, ferns, herbs, small philodendrons)
- S-hooks or small carabiners to hang the jars
Building the grid
Start by mounting two vertical ropes from the ceiling beam or frame, then weave horizontal ropes across at regular intervals — roughly 25–30 cm apart. Tie each intersection with a square knot for stability. The grid doesn't need to be perfectly even — slight irregularity is part of the handmade look. Tension the outer ropes tightly; let the inner ones hang slightly looser.
Hanging the plants
Fill small glass jars with water and pop in water-propagated cuttings, or use small hanging planters filled with potting mix. S-hooks through the rope grid make it easy to reposition plants as they grow. Mix jar sizes for a more natural, organic look.
Choosing your plants
The best plants for this project are those that trail or stay compact. Pothos and heartleaf philodendron are ideal — they're fast-growing, tolerant of lower light, and look beautiful trailing down from a jar. Fresh herbs like mint, basil or coriander work brilliantly in a kitchen setting.
Interior tips
- Position near a window so the plants get enough light. The rope grid will cast beautiful shadows on the wall behind it when the sun is low.
- Use matching jars for a cleaner look, or deliberately mismatched sizes for a more bohemian feel.
- Combine with wooden beams or a doorframe as the mounting structure — it reinforces the natural, farmhouse aesthetic.
- Keep plants at different stages: some rooted in soil, some propagating in water. The visual variety makes the divider feel alive and ever-changing.
- Change plants seasonally — swap in fresh herbs in spring and summer, switch to hardier indoor plants in winter.
Step-by-step: building your divider from scratch
Here is a more detailed walkthrough for those tackling this project for the first time.
Step 1: Measure and mark your space. Decide how wide and tall you want the divider to be. A standard doorway opening (around 80 cm wide, 200 cm tall) is a perfect starting point — it gives the structure clear boundaries to span.
Step 2: Install your mounting points. Fix two ceiling hooks at the top of your opening, spaced evenly. If you're working between two walls rather than in a doorframe, you can drill eye bolts into wall studs on each side. Make sure all fixings go into structural material — rope and plants together are heavier than they look.
Step 3: Cut your vertical ropes. Cut two or three lengths of jute rope slightly longer than your ceiling height (add 30 cm for tying knots). Attach each one to the ceiling hooks with a secure overhand loop.
Step 4: Weave the horizontal ropes. Cut horizontal lengths to span the full width, again with extra for knotting. Starting from the top, tie each horizontal rope to both vertical ropes using a square knot at each intersection. Check that the spacing is even as you go — use a ruler or piece of cut card as a spacer to keep the intervals consistent.
Step 5: Tension and adjust. Once all the ropes are tied, gently pull the structure taut from the bottom. Add a floor-level anchoring point — a heavy pot, a small furniture piece, or a weighted dowel threaded through the bottom rope — to keep the divider from swaying.
Step 6: Hang your plants. Clip S-hooks through the rope at your chosen positions and hang jars or planters from them. Start with the largest or heaviest plants first, then fill in with smaller cuttings.
Caring for plants on a rope divider
The main challenge of a plant divider is watering — each jar or pot needs checking regularly, and water can drip onto the floor beneath. A few practical solutions:
- Water in place using a small watering can with a long, narrow spout so you can target the soil or water without splashing.
- Place a long tray, mat, or piece of oilcloth on the floor directly under the divider to catch drips during watering.
- Check soil moisture by feel rather than on a schedule — pots in a divider dry out at different rates depending on their position and exposure to air flow.
- Remove yellowing leaves promptly to keep the divider looking its best. A regular once-a-week check takes only a few minutes and prevents small problems from becoming large ones.
Customising the look
The beauty of a rope divider is how much you can personalise it. Here are a few variations on the basic design.
Add wooden beads: thread large wooden beads onto the horizontal ropes between knots for an extra layer of texture and a more decorative look.
Use coloured rope: natural jute is the most common choice, but black cotton rope gives a more modern, graphic look. Mix natural and coloured rope for a subtle contrast.
Incorporate macramé knots: if you're familiar with basic macramé, add square knots, lark's head knots, or spiral half-hitches along sections of the vertical ropes to build more visual interest into the structure.
Vary jar types: small preserve jars, apothecary bottles, test tubes in a wooden rack — all give a slightly different character to the finished divider.
Budget breakdown
This project can be completed for well under €50. Natural jute rope costs around €8–12 for 100 metres — more than enough for a standard divider. Ceiling hooks are a few euros for a pack of four. Glass jars are free if you save jam or preserve jars, or cheap from a supermarket or pound-store. Plants are the biggest variable cost, but cuttings from existing plants cost nothing.
Related posts

How to Frame a Doorway with Plants for a Stunning Kitchen View
Trailing plants on a shelf above a black-framed doorway, floor plants on either side, and a warm Scandi kitchen beyond — how to make a transition space the most beautiful part of your home.

The Hygge Living Room: Layering Textures, Candles and Natural Materials
Patterned cushions, chunky knit throws, wooden tray tables, candles and eucalyptus — how to build a living room that feels genuinely cosy all year round.
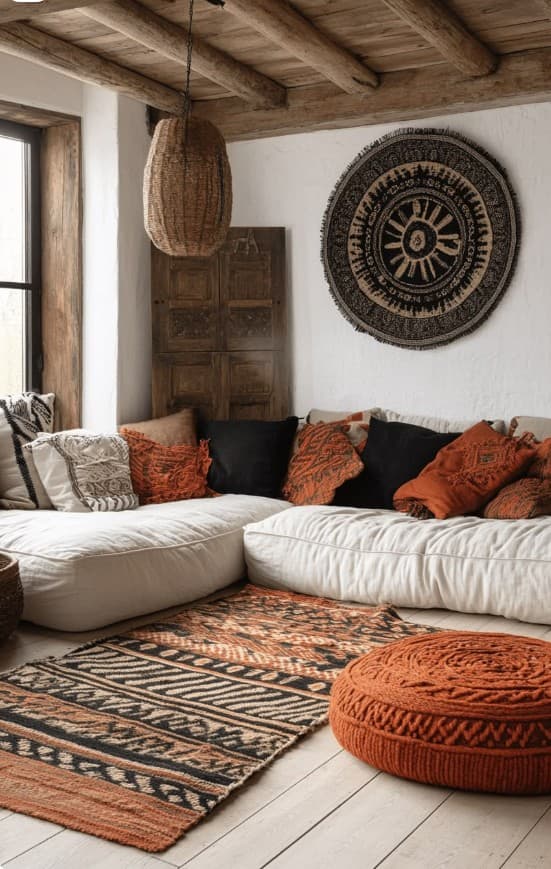
Rust, Black and White: The Boldest Boho Palette in One Living Room
A low white sectional sofa loaded with rust-orange ethnic cushions, a black circular wall tapestry, a bold kilim rug and a rattan pendant — this is boho living room design at its most confident and distinctive.